Most people who set up a standing desk in a home office do it in the wrong order. They buy the desk first, shove it against the nearest wall, keep the monitor exactly where the old one sat, and then spend six weeks wondering why their neck hurts more standing than it did sitting down.
I have done this the other way around for 310 homes. The desk is the last thing you commit to, not the first, because everything above the desk (monitor distance, keyboard plane, lighting layers) and everything below it (chair pairing, power outlet, cable planning) constrains what the desk is allowed to be.
This is the short version of how to set up a standing desk in a home office, in the order I run it on a client install, plus the three pieces of hardware I would actually put in a home workspace and the shapes I would not.
Why you should trust me
I spent nine years as an office facilities manager in Seattle, buying and assembling chairs and desks for 400-person floors. Then I spent six years running a two-person desk setup service, and we have built out 310 home offices since.
The habit that came out of that work: I keep a notebook with every chair's seat depth and every desk's height range written down in inches, measured with a tape rather than copied off a spec sheet. Manufacturers round. Tape measures do not.
A chair either fits your body or it does not. Brand and price are noise until the seat depth and height range match your measurements. Most standing desks fail on wobble at standing height, not on motor speed, which is why I raise every frame to the top of its range and lean on it before I trust it. And the cheapest correct setup beats the most expensive wrong one every single time.
How I picked and how I tested
For this guide I grouped the options the way I group them for clients: a full-size sit stand desk for a dedicated room, a small mobile desk for the person trying to set up a standing desk in a work from home corner that has to double as something else, and a converter for people who already own a fixed desk they love.
Every candidate went through the same checks. I compared the stated standing height range against a 5'9" reference body and a 6'2" reference body, because a desk that tops out at 45 inches is a different product for those two people. I checked the footprint against a 5-foot wall, since that is about the smallest stretch most people can spare without wrecking the room layout. I looked at where the power strip or the power outlet ends up relative to the monitor, because a socket behind the legs means you crawl under the desk every week. And I looked at how each one behaves at the top of its range, which is where cheap frames give themselves away.
The number I care about most is wobble. A desk that shakes when you type is a desk you will stop raising within a month, and that failure mode kills more standing desks than any motor ever has.
I also ran the numbers on everything that is not the desk. A monitor arm, a task light, a power strip, and a footrest add cost, but they are the difference between a setup that works at both heights and one that only works when you sit. Any desk that cannot take a clamp or a grommet mount loses points with me, because it locks you out of fixing the monitor distance later.
The gear you need to set up a standing desk in a home office
Three shapes cover almost every home. Pick the shape first, then the product, then the accessories. If you plan to set up a sit stand desk in a home office with a door you can close, the full-size frame is the right spend. If the desk has to share a room, the smaller two options below are the honest answers.
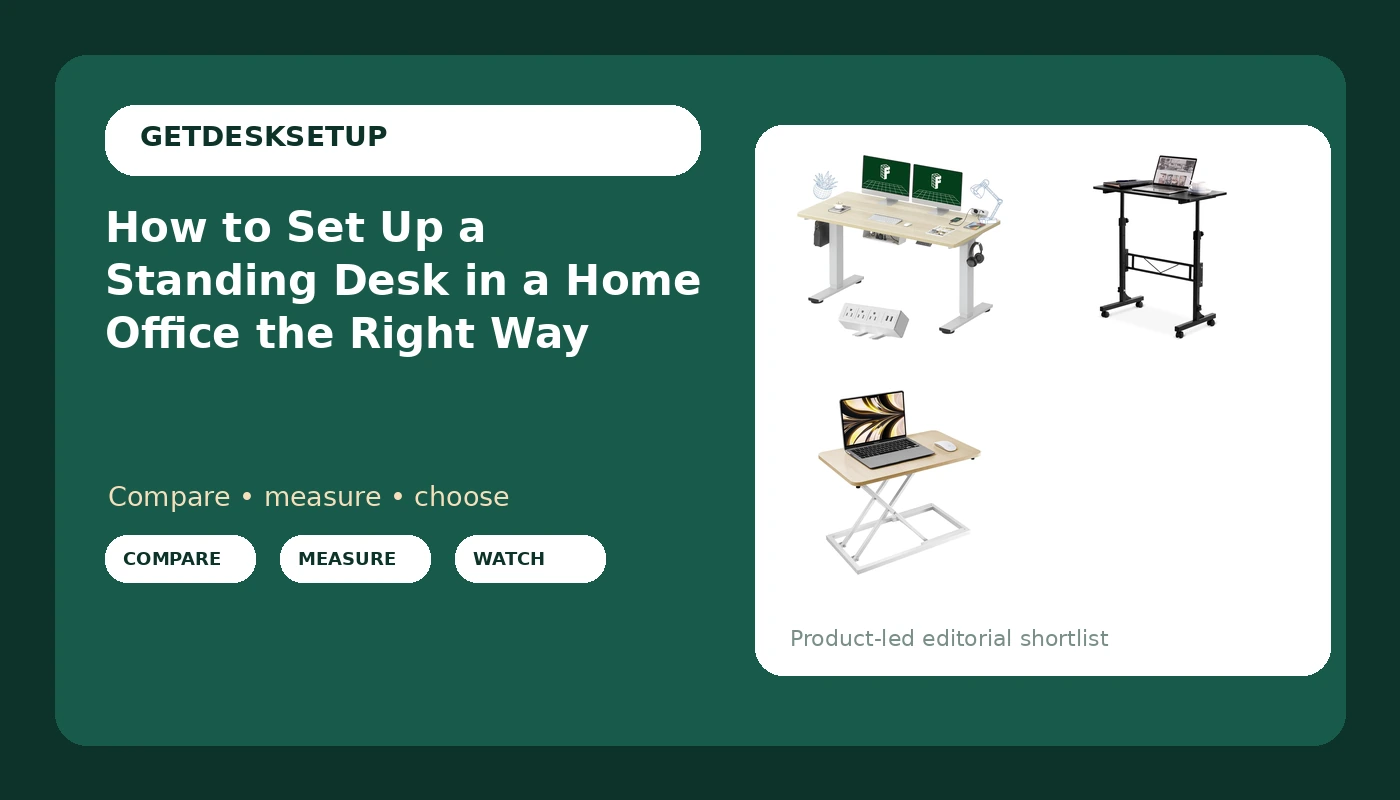
Our pick: FLEXISPOT EN2 55"x28" Whole-Piece Standing Desk with Power Strip
Our pick
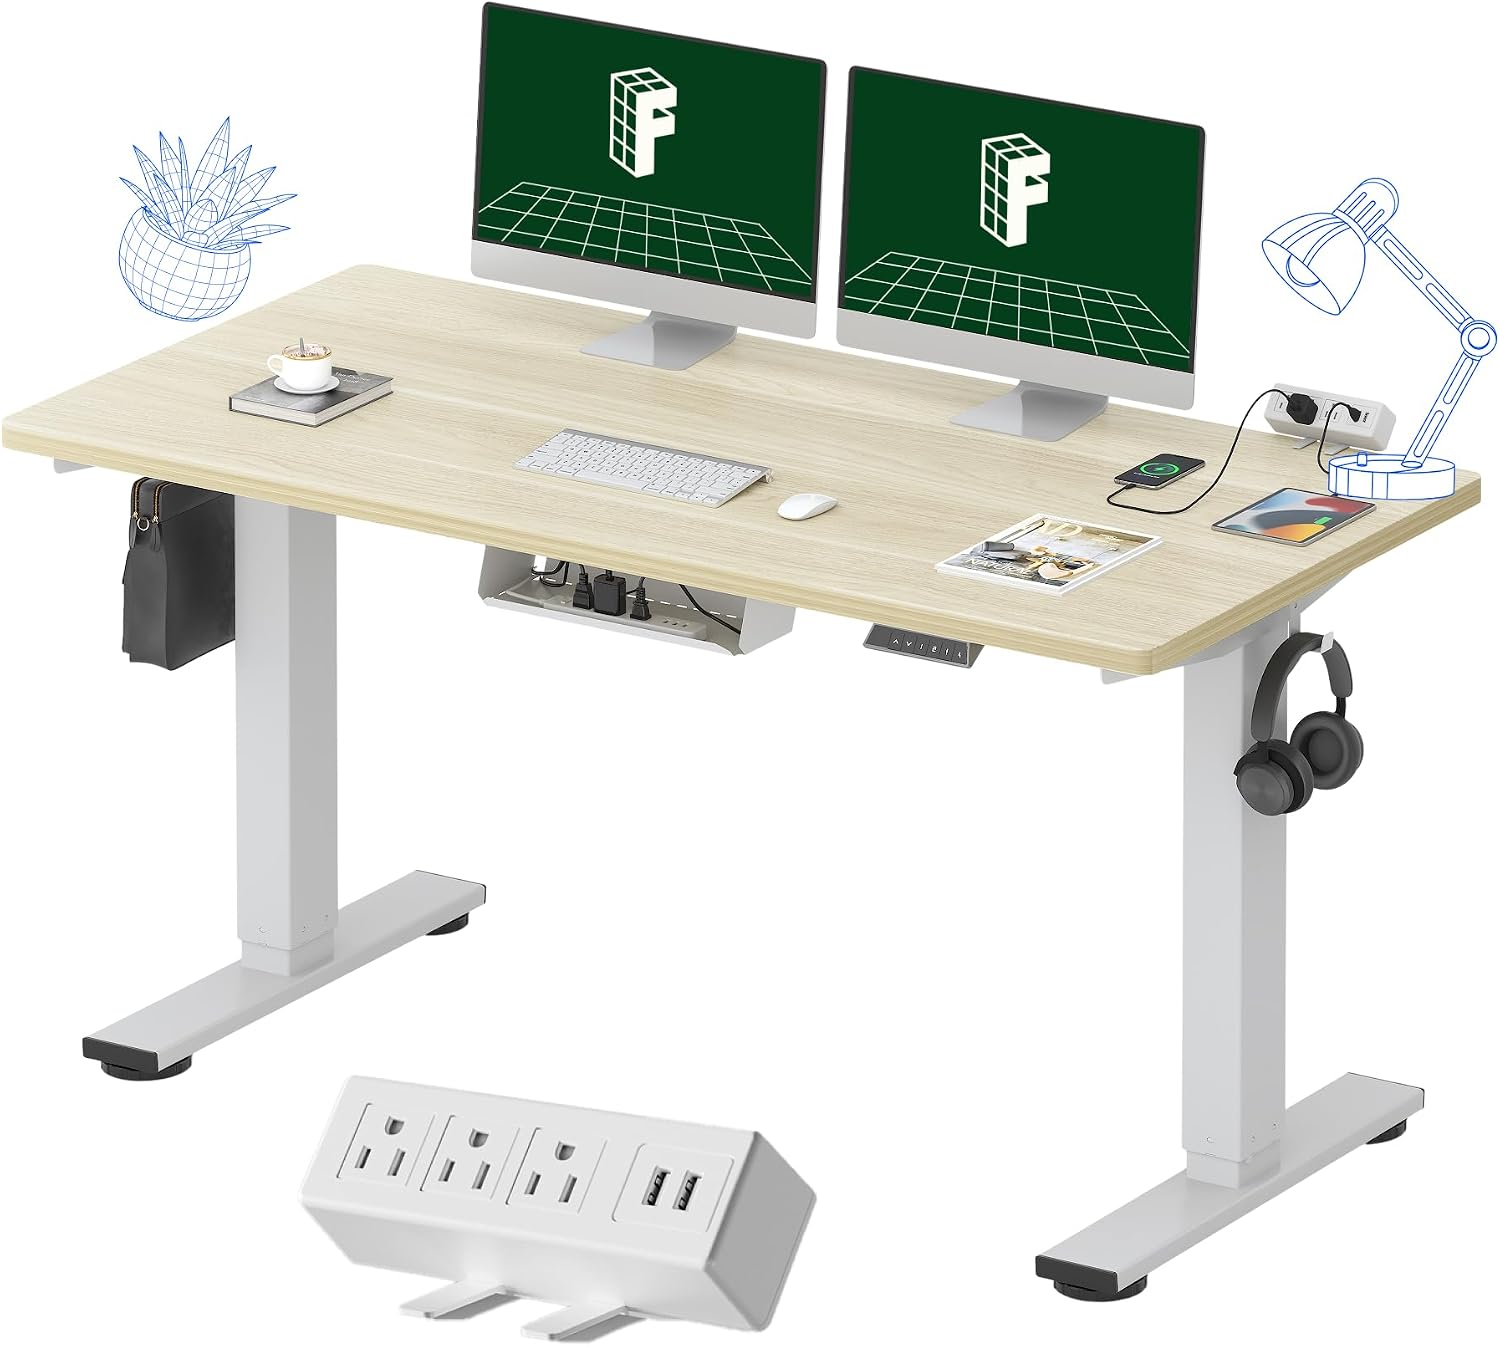
FLEXISPOT EN2 55"x28" Whole-Piece Standing Desk with Power Strip
This is the one I would put in a client's office and expect to see again in a year. The top is a single piece rather than two halves bolted at a seam, which matters more than people think: a seam sits exactly where a monitor arm clamp and a keyboard want to be, and a clamp that straddles a seam will never hold torque the way one on solid material does.
The integrated power strip is the second reason. One power outlet on the wall, one cord to the desk, and everything else plugs in above the floor. That single decision removes half the cable planning work from the rest of this article.
The 55 by 28 footprint wants a wall of at least five feet, and it will take a 27-inch monitor plus a laptop without crowding. If you need dual 27-inch panels, measure before you order, because 55 inches goes fast once two screens and speakers are on it.
Assembly order matters here. Legs to the frame first, then the top, then the flip with two people. Reversing that order is how people crack a whole-piece desktop before they ever plug it in.
Check current Amazon price
Flaws but not dealbreakers: It is heavy, and the whole-piece top means you want a second person for the flip. Budget an hour, not twenty minutes.
Anyone with a dedicated room and a wall to give it will be happy here. If you are renting a room where the desk has to move for guests, look at the mobile pick below instead.
Budget pick: Small Standing Desk Adjustable Height, Mobile Stand Up Desk with Wheels
Budget pick
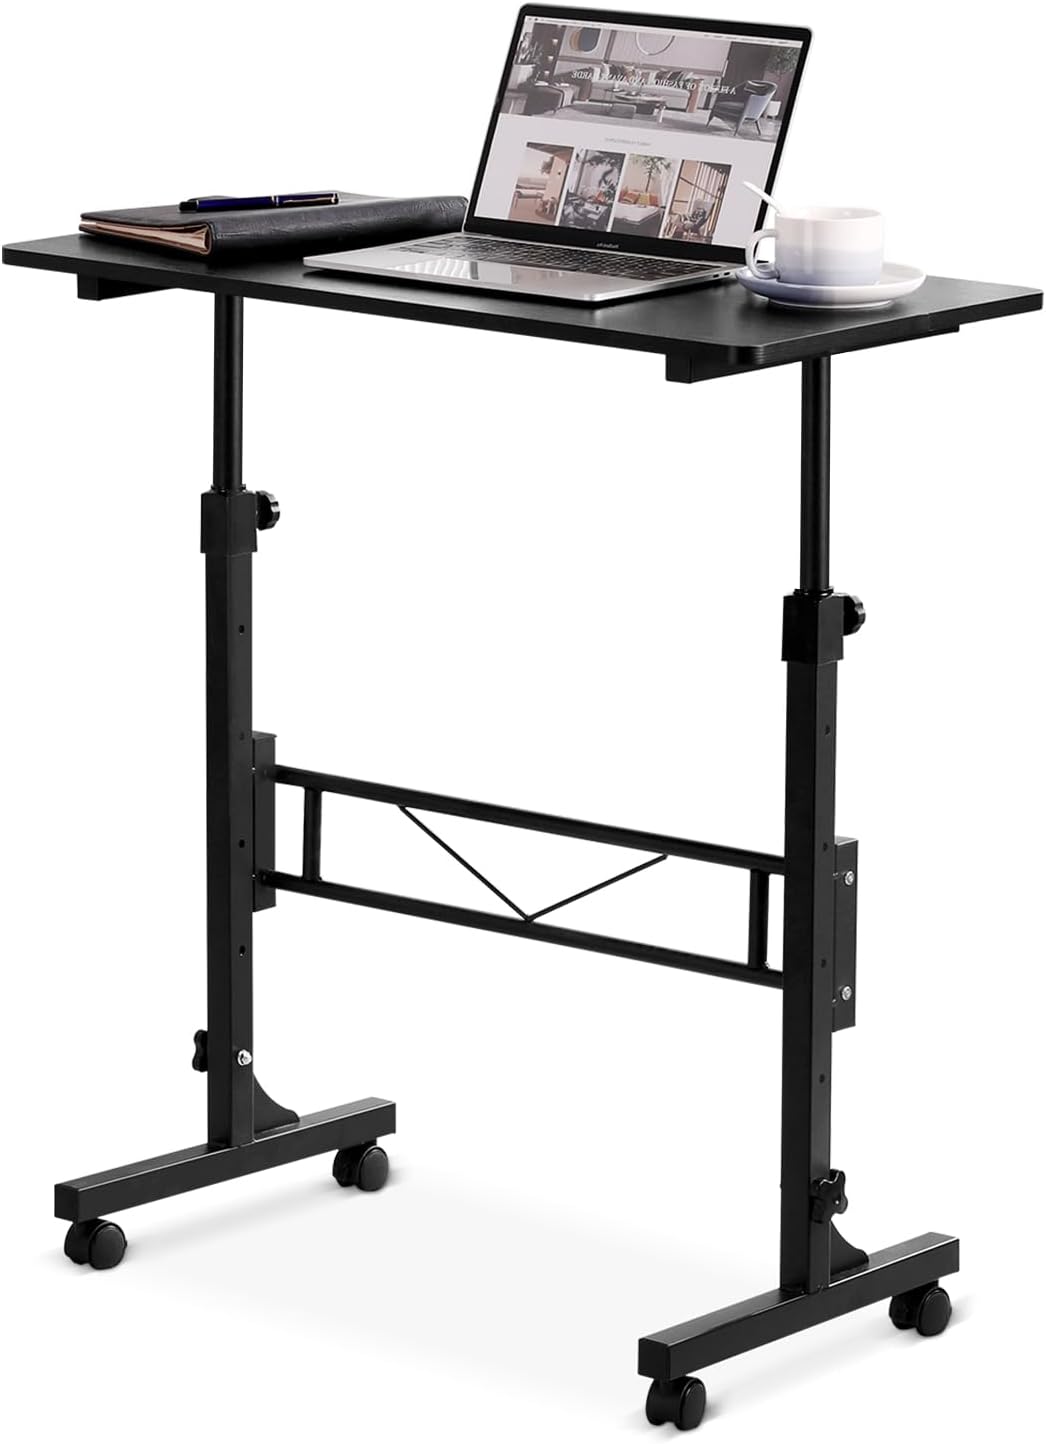
Small Standing Desk Adjustable Height, Mobile Stand Up Desk with Wheels
Wheels are the whole argument. When you set up a standing desk in a home workspace that has to serve as a living room or a guest room, being able to roll it into the corner at 6 p.m. is worth more than any feature on the frame. I have put this shape in bedrooms, in front of closets, and in one studio where the desk spent weekdays by the window and weekends against the wall.
The trade-off is surface area. A small top means one monitor, one keyboard, and not much else. If your work involves a second screen or a paper trail, this is the wrong shape and you should skip it.
Because it moves, cable planning matters more here, not less. Mount one power strip to the frame, run a single cord to the wall with slack, and unplug it before you roll. A moving desk with a taut cord is a desk that will eventually pull a monitor off angle or yank a laptop to the floor.
Check the wheel locks before you load the desk up. A locking caster that does not actually lock turns every typing session into a slow drift across the room, and that is the complaint I hear most about mobile desks in general.
Check current Amazon price
Flaws but not dealbreakers: The wheels add height, and they roll when you lean on the desk. Lock them. If you want a desk that never moves, spend the money on a fixed frame instead.
Anyone in a studio, a shared room, or a rental with a tight room layout should look here first.
Converter pick: Omhuzsyo 24 in Height Adjustable Standing Desk Converter Stand Up Riser
Converter pick
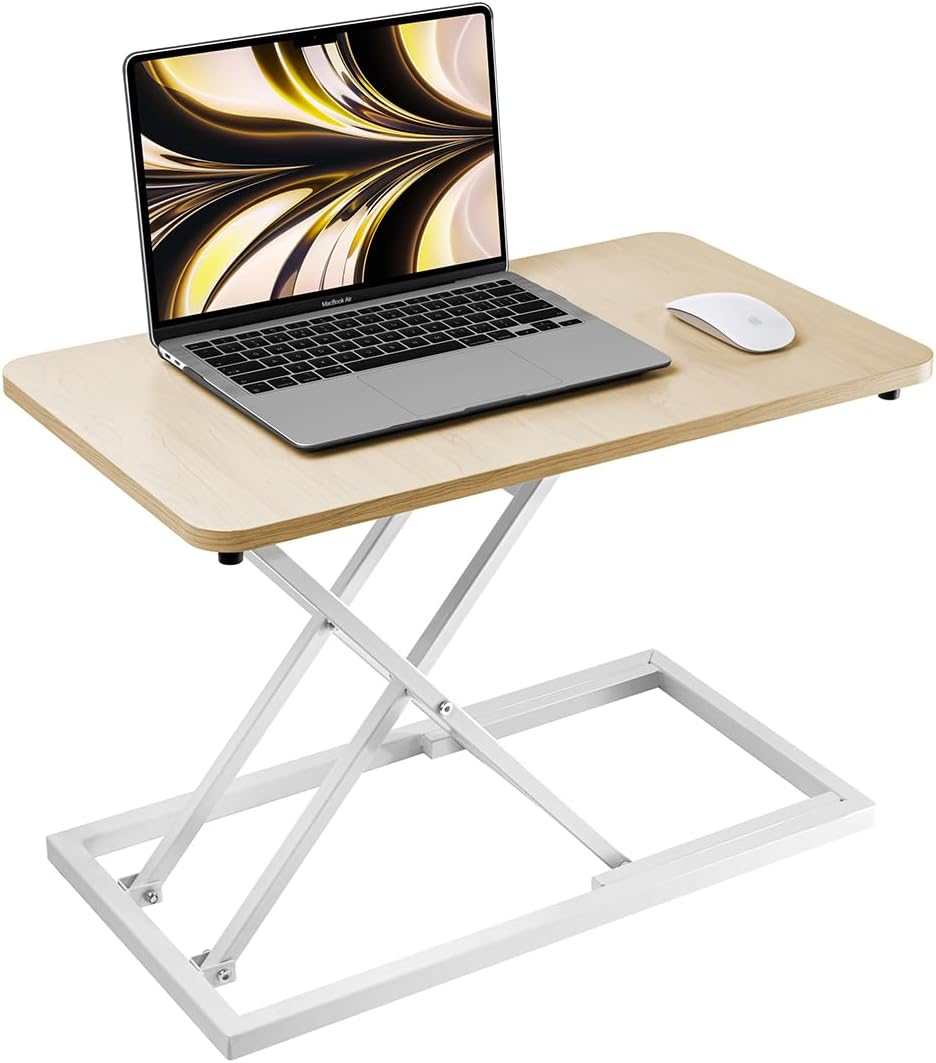
Omhuzsyo 24 in Height Adjustable Standing Desk Converter Stand Up Riser
A converter is the answer for one specific person: someone who already owns a fixed desk they love, cannot replace it, and still wants to stand for part of the day. It sits on top of the existing surface and lifts the monitor and keyboard together.
Two honest trade-offs. First, it eats desktop depth, so a shallow desk becomes a shallow desk with no room for anything but the converter. Second, on most converters the keyboard surface and the monitor surface rise as one unit, which means you cannot set monitor distance and keyboard height independently. That is the reason I still prefer a full desk when the budget allows.
Measure the depth of your existing desk before you buy one of these. A converter on a 24-inch surface leaves you almost no room for a wrist rest or a notebook, and that is the point at which people stop using it and go back to sitting.
Who should skip it: anyone with a monitor arm already clamped to the back edge of the desk, and anyone whose desk is shallower than about 24 inches.
Check current Amazon price
Flaws but not dealbreakers: Raising and lowering takes both hands and a bit of commitment. If you are the kind of person who will not bother, buy a desk with a motor.
Anyone keeping a beloved fixed desk, or standing for only an hour or two a day, gets the most out of this.
The actual setup workflow
Now the part you came for. None of this requires equipment you do not already own, but a tape measure makes it faster and a notebook makes it permanent.
Step one: Room layout. Walk the room before you plug anything in. Find the power outlet, the window, the door swing, and the heating register. The desk goes perpendicular to the window, not facing it, because facing a window means glare on the screen and a backlit face on every video call. Minimum desk width is 48 inches for a single monitor and 60 inches for two. If the wall cannot give you that, change the wall, not the desk.
Step two: Desk height. Sit and stand at the desk before you trust any number on a box. Standing, your elbows should bend to roughly 90 degrees with your forearms level, and the desk surface should land at or just below standing elbow height. Sitting, run the same test with your feet flat and your shoulders relaxed. Check that the desk's range covers both positions with room to spare, because a frame that only just reaches your standing height is a frame you will fight.
Step three: Chair pairing. The chair is not a separate decision from the desk. Your seat pan should leave two to three inches between the front edge and the back of your knee, and your feet should sit flat on the floor. The most common home office mistake I see is a desk that is too tall, which forces the chair up, which lifts the feet and puts pressure under the thighs. Fix the desk height first and let the chair follow, not the other way around.
Step four: Monitor distance. Arm's length is the starting point, roughly 20 to 30 inches from your eyes to the glass, with the top of the screen at or slightly below eye level. This is where a monitor arm earns its place, because it lets you move the screen independently when you raise the desk. If you are still deciding, how to choose a monitor arm for a standing desk covers the clamp and grommet options.
Step five: Keyboard and mouse plane. Elbows at 90 degrees, wrists flat, keyboard close to the front edge of the desk so you are not reaching. The mouse goes on the same plane and within a few inches of the keyboard. If you have to lift your shoulder to reach it, the desk is too deep for your arm length, and that is a sizing problem, not a habit problem.
Step six: Cable planning. Cables are not aesthetics. A cable that pulls on a monitor arm changes the monitor angle within a week. Leave a service loop at every joint, run one cord from the desk to the wall, and use hook and loop ties rather than zip ties so you can re-route when you add a device. Test the full range of motion with everything connected before you call it done.
Step seven: Lighting layers. Three layers, not one. Ambient light overhead or from a corner, a task light aimed at the desk surface, and a bias light behind the monitor or a small lamp aimed at the wall behind it. Overhead light alone puts your screen in a pool of glare. Task light alone leaves the wall behind the monitor dark and makes the screen feel twice as bright as it is.
Step eight: Ventilation and the first two weeks. Standing in a closed room with a monitor, a laptop, and a dock gets warm. Keep the desk off the register, and if the room has one door, prop it. Then run the schedule: 20 to 30 minutes standing per hour for the first two weeks, then build from there. Standing all day is not the goal and it is not better for you.
The competition and why it lost
Wall-mounted folding desks solve the tiniest rooms, and I have installed a few, but they take the monitor with them when they fold and they need a wall you are allowed to drill. They lose on flexibility, not on price.
Treadmill desks lose for a different reason. A walking pad is a separate purchase, and a desk height that is correct for walking at two miles per hour is wrong for typing, so you end up adjusting twice an hour or compromising on both. That belongs in a walking pad guide, not this one.
Laptop risers are the cheapest option and the worst fit. They raise the screen and the keyboard together, which breaks the monitor distance rule in the other direction: the screen ends up too low and too close at the same time. A riser plus an external keyboard is fine. A riser alone is a neck ache with a receipt.
Pneumatic converters that need both hands and a firm shove lose to anything with a motor or a light lift, because the best standing desk is the one you actually raise. And a fixed-height desk with a tall stool is not a sit stand setup, it is a compromise that puts your feet on a rung instead of the floor.
If you are still choosing the chair that goes with all of this, that is a different guide. Get the chair and the desk sized to the same body, or neither one works.
What this all costs
The money splits into three buckets: the desk, the chair, and the small stuff.
The small stuff is the part people forget. A monitor arm, a task light, a power strip, hook and loop ties, and a footrest if your chair does not adjust low enough will together run you more than the cheapest option on this page, and they are the difference between a setup you use and a setup you tolerate.
Over five years, the math looks like this.
- Converter route: the lowest entry cost, and the money you save is the fixed desk you already own. Check current Amazon price
- Small mobile desk: mid-range, and the wheels are the feature you are paying for. Check current Amazon price
- Full-size sit stand desk: the most money, and the one I would spend it on if the room allows. Check current Amazon price
Cost per day over five years is the honest way to look at it. Even the most expensive option here comes out to pocket change per working day, which is a strange way to think about a piece of furniture until you remember you will sit or stand at it for eight hours of that day.
What I would not do is spend the desk budget on a desk and skip the chair. A cheap correct setup beats an expensive wrong one, and a chair that matches your seat depth will do more for your back than a more expensive chair that does not. When you set up a standing desk in a home office on a tight budget, the chair is the last place to cut, not the first.
That's the job. Measure once, write the numbers in a notebook, set the desk height from those numbers rather than from a photo on the internet, and the setup stops being a guess. Then stand up for twenty minutes and sit back down.